How to change Name Servers in google domains

If you are wondering what are name servers and how to change name servers in google domains, then you have came to the right place. In this article I’m going tell you what are name servers and how you can change name servers in google domains.
What are name servers?
When a user enters a URL in their browser, like “EasyBlogging.net, there needs to be some way to connect that URL with the underlying web server that powers the website at that domain name.
Just think about that how difficult it would have been if you had to enter the actual IP (Internet Protocol) address of a web server every time you wanted to visit a website on the internet. It would be very difficult for you to remember whether it was 179.89.229.118 or 189.89.229.119 and it would be a complete mess and waste of your precious time.
Nameservers play an important and convenient role in connecting an URL with a server IP (Internet Protocol) address in a more human-friendly and easier way.
Nameservers do look like any other domain name on the internet. When you look at a website’s nameservers, you will usually see a minimum of two nameservers (though you can use more than two). Here’s an example of what nameservers look like:
ns-390.awsdns-47.com
Ns-106.awsdns-06.org
Nameservers make the working of the internet convenient and instead of serving up a website, these nameservers also help in reach of direct traffic to a website.
Role of Nameservers
To understand the important role that nameservers play in directing traffic on the Internet, let’s take a look at a real example.
Let’s say you want to visit the homepage of EasyBlogging.net. On the real ground, this is simple: you type “EasyBlogging.net” into your web browser’s address bar and you see the EasyBlogging.net’s homepage. Isn’t this easy?
But behind the scenes in the background, the high level process goes something like this:
- You type “EasyBlogging.net” into the address bar and hit enter.
- Your browser sends a request to that domain’s nameservers.
- The nameservers respond back with the IP address of the website’s server.
- Your browser requests the website content from that IP address.
- Your browser retrieves the content and renders it in your browser.
Suggested: Effective methods of Google Search
In order to visit a website you should first access a Domain Name Server on the internet. If there is a problem with the the decentralized naming systems, which responsible for turning the hostnames into IP addresses, you may see a message such as “DNS server not responding” on your web browser.
In short and simple, Nameservers helps in establishing connection of URLs with the IP address of web servers. Nameservers are one of the most important parts of the Domain Name System (DNS), which in the common language many people call the “phone book of the Internet”. To change name servers in Google Domains follow the steps given below.
Changing Name Servers in google domains:
Step 1 : Log in to your google account which has the google domain, then open google domains.
Step 2 : Select the domain for which you want to change the name server.
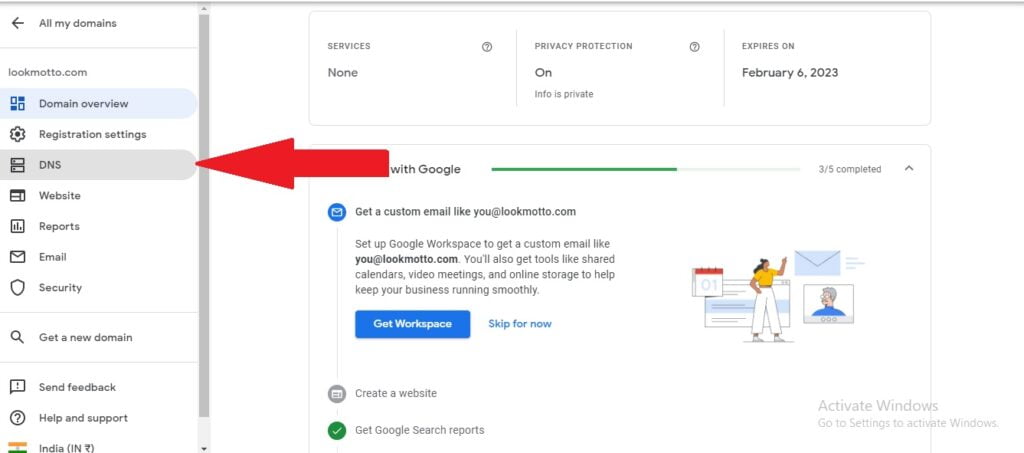
Step 3 : Select DNS option from the left menu as shown in the image below.
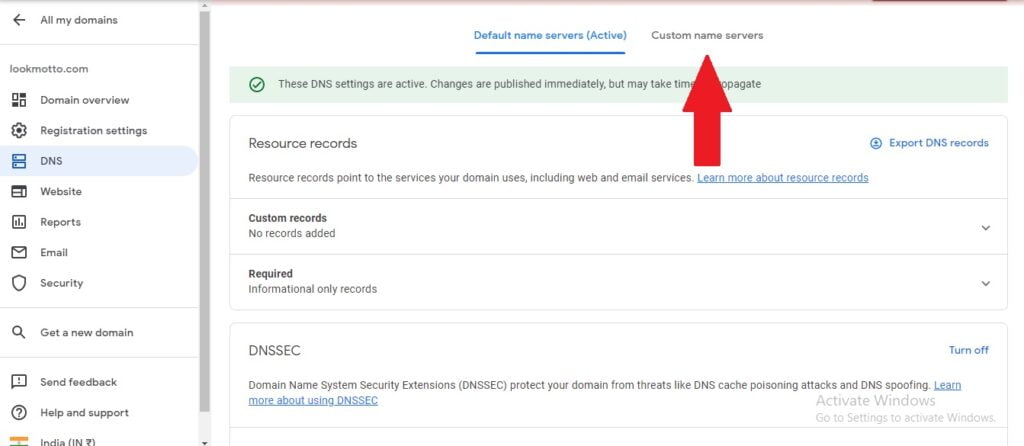
Step 4 : Select the custom name servers as shown in the image below.
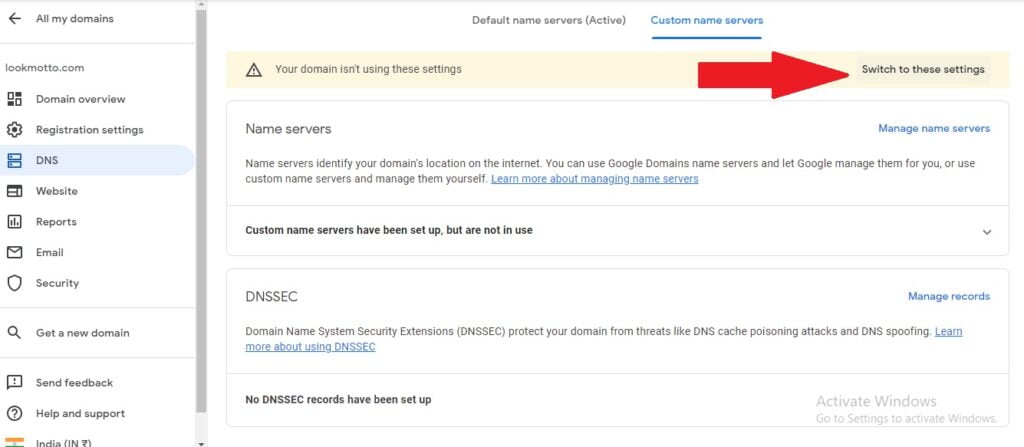
Step 5 : Click on switch to these settings as shown in the image shown below.
Step 6 : Click on manage name servers as shown in the image below.
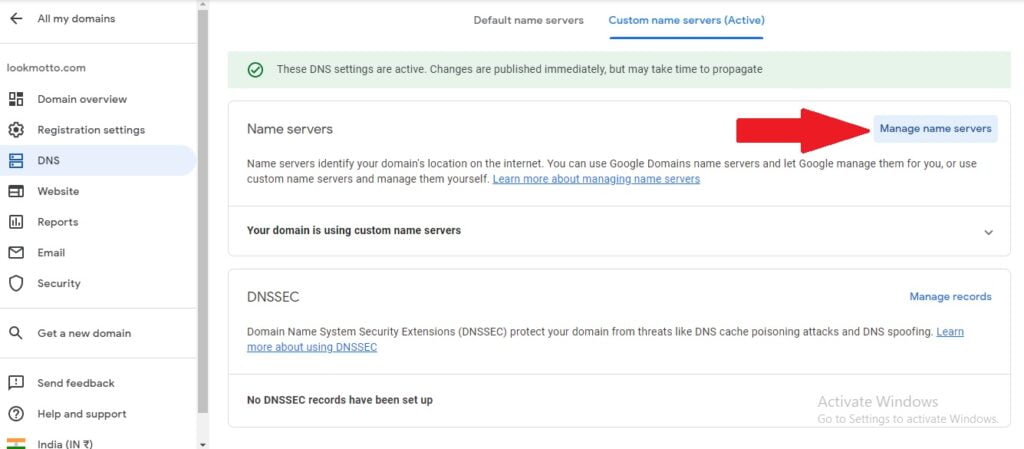
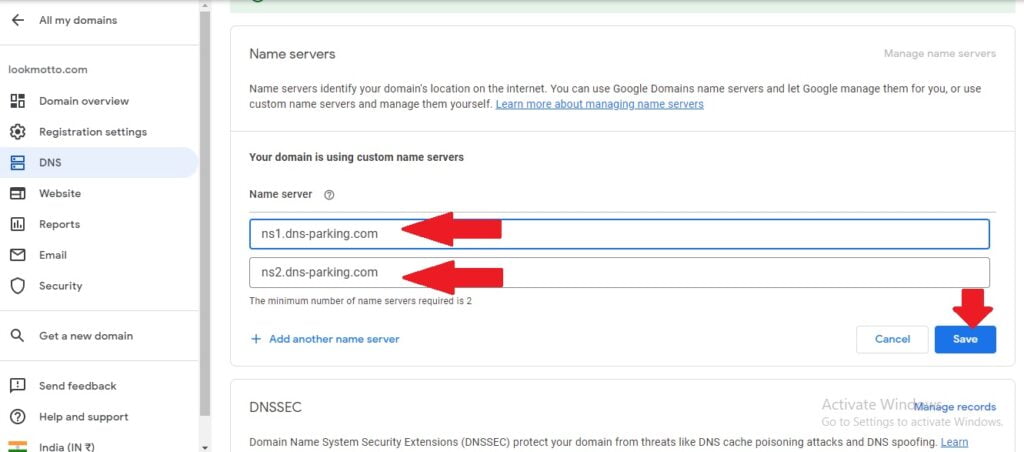
Step 7: Enter the custom name servers, you can enter more name servers by clicking on option “add another name server” click on save to finish changing name servers.
Video Guide:
If you are facing any complications in changing name servers in google domains please let me know in the comments, I will respond as soon as possible.